Lifeline documents checklist: what to submit to get approved
Advertisements
Learn what identity, address, and eligibility documents to submit for faster Lifeline approval in 2026.
If you want to get approved quickly, you need to think like the National Verifier thinks.
It is trying to confirm three things: who you are, where you live, and how you qualify.
Notice: This content is independent and for informational purposes only.
We are not affiliated with, sponsored by, partnered with, or in control of the FCC, USAC, the National Verifier, or any Lifeline provider mentioned.
Lifeline documents checklist: what you must prove to get approved
To pass review, your documents must be readable and must match your application details.
That means your name, date of birth, and address should be consistent across what you submit.
It also means your proof of eligibility must show you qualify by program participation or by income, using acceptable time windows.
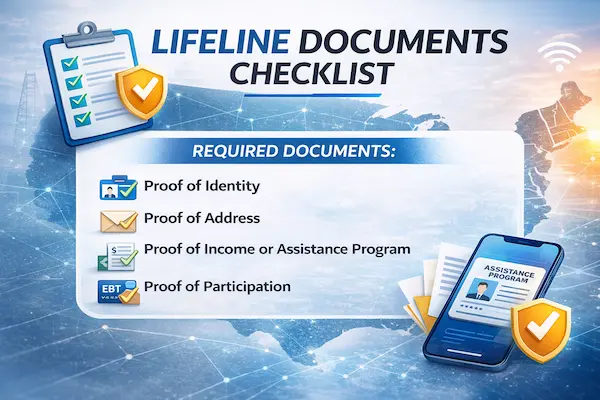
- Identity: full legal name, date of birth, and required identifier information.
- Address: your physical residential address tied to your name.
- Eligibility: proof you qualify through a program or income rules.
Once you organize your paperwork this way, approval becomes a simple checklist instead of a stressful guessing game.
How the National Verifier checks you first
Before asking you for uploads, the National Verifier may try to verify you automatically using identity verification services and address matching tools.
It can also run checks designed to prevent duplicate Lifeline benefits for the same person or the same household.
If something does not match, you move into the “documentation” path, where clear copies are the difference between fast approval and avoidable delays.
Practical takeaway: You are not “failing” when you get asked for documents.
You are simply being routed to the manual verification path.
1) Proof of identity and age
You must submit a document that shows your full legal name and your date of birth.
In most cases, the system also needs a matching identifier such as the last 4 digits of your Social Security Number or a full Tribal ID number, depending on your situation.
The easiest way to win here is to pick one strong, unexpired, government-issued ID that is clean and readable.
If you do that, you reduce the chances of a “can’t read” or “doesn’t match” rejection.
Best options for proof of identity
- Unexpired Driver’s License or state-issued ID.
- U.S. Passport.
- Government, military, state, or Tribal ID that clearly shows your name and date of birth.
Common alternatives if you do not have a standard ID
- Birth certificate.
- Certificate of Naturalization or proof of U.S. citizenship documentation.
- Permanent Resident Card where applicable to your eligibility documentation workflow.
- Social Security-related documents that clearly tie your name to required identifiers, when accepted in the documentation guide.
If your name has changed due to marriage, divorce, or a court order, you should prepare supporting proof so your application name and your document name align.
That one detail alone prevents a surprising number of “mismatch” outcomes.
2) Proof of address
You must submit a document that shows your full name and your physical residential address.
In many cases, a P.O. Box is not accepted as a primary residence, because the system needs to confirm where you actually live for household-based rules.
The best approach is to use a recent, standard household document that most reviewers recognize immediately.
Think “boring and obvious,” because boring and obvious gets approved faster.
Best options for proof of address
- Recent utility bill such as gas, electric, or water.
- Current lease statement or mortgage statement.
Other address documents that can work
- Driver’s license or state ID that displays your current residential address, if it is up to date.
- W-2 or a recent tax return that clearly shows your address.
If your utility bill is in someone else’s name, you may need another address document that ties your name to that residence.
When you are unsure, pick a document that includes both your name and address in one place, because that is usually the cleanest proof.
3) Proof of eligibility through a qualifying program or income
You only need to qualify through one method: program participation or income-based eligibility.
So you do not need to upload everything you have, and in fact, uploading too much can create confusion.
Pick the strongest path and submit the clearest proof for that path.
Method A: program participation
If you qualify through a program, your proof must show you are currently enrolled, and it should include a recent date window or a future expiration date when applicable.
In general guidance, program documents are expected to be recent, commonly within the last 12 months, unless the proof clearly shows active status through an expiration date.
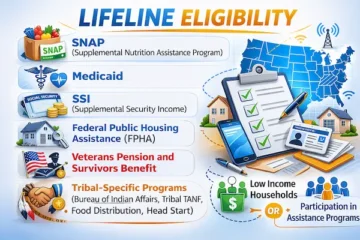
People most often qualify through programs like:
- SNAP (Food Stamps).
- Medicaid.
- SSI.
- Federal Public Housing Assistance (FPHA).
- Veterans Pension or Survivors Benefit.
What to submit for program participation
- Benefit award letter or Statement of Benefits.
- Program participation card, if it shows your name and an issue or expiration date.
- Online portal screenshot that clearly shows your name, the program, and active status, when accepted under documentation guidance.
Before you upload, look for three things on the page: your name, the program name, and a date that supports current participation.
If one of those elements is missing, pick a different page from your benefits packet that includes it.
Method B: income-based eligibility
If you do not use the programs above, you can qualify by income if your household income is at or below the Lifeline threshold, commonly stated as 135% of the Federal Poverty Guidelines.
Official Lifeline guidance publishes tables by household size, and those tables can update annually.
The simplest “yes, this is enough” document for income qualification is usually a complete tax return for the prior year.
It’s clear, familiar to reviewers, and it covers a full year in one package.
Best option for income qualification
- Prior year State, Federal, or Tribal tax return.
If you do not have a tax return
If your income documentation does not cover a full year, Lifeline guidance commonly requires three consecutive months of the same type of income proof, from within an acceptable recent period.
This is where people get tripped up, because they upload one pay stub and hope it works.
Three consecutive months is the safer standard when you are using partial-year proofs.
- Current pay stubs for three consecutive months.
- Social Security benefits statement, where it clearly supports your income claims.
- Unemployment or Workers’ Compensation statements.
- Child support or alimony documentation, such as a court award or decree, where applicable.
The trick is consistency.
Pick one income proof type and submit three consecutive months of that same type, instead of mixing different documents that tell an unclear story.
Lifeline documents checklist for special situations
Some applications get delayed not because you are ineligible, but because your situation needs an extra form to explain household structure or identity verification gaps.
If any of the scenarios below sound like you, plan ahead now.
If someone at your address already has Lifeline
Lifeline is generally limited to one benefit per household, so shared addresses can trigger a duplicate address flag.
If you live in a multi-family home, nursing home, shelter, or a place where another person receives Lifeline, you may be asked for the Lifeline Household Worksheet to show you are a separate economic household where allowed.
- Complete the Household Worksheet fully, using your full legal name.
- Answer household questions consistently with how you file taxes or share expenses.
- Do not guess if you are unsure about household definitions, because inconsistent answers cause delays.
If you are asked for “Proof of Life”
In some error-resolution paths, you may be asked to prove you are living through specific document combinations, including an unexpired document with key identity elements and a second document showing recent life activity within a defined window.
If you see that request, do not panic.
Follow the exact instructions provided in your National Verifier error message, and submit only what it asks for.
Pro tips for fast approval
You can do everything right and still get delayed if your files are hard to read or your details do not match.
These tips are the “quiet difference” between a smooth approval and a frustrating back-and-forth.
- Never send originals: submit copies or high-quality photos, not your original documents.
- Make it readable: full page visible, no cut-off corners, no glare, and no blurry text.
- Match your application exactly: same spelling, same spacing, same apartment number format, and the same legal name.
- Use one strong document per category: one for identity, one for address, and one for eligibility, unless you are specifically asked for more.
- Watch the dates: program proof should show current enrollment with acceptable recency or a future expiration date, and income proof should meet the required coverage window.
- Save your confirmation: keep submission receipts, reference numbers, and a copy of what you uploaded.
Speed hack: Before you submit, compare your application and documents side by side.
If a human reviewer can match them in five seconds, you are in great shape.
Lifeline documents checklist recap you can follow in 5 minutes
If you want a simple checklist you can literally tick off, use this.
It covers the exact three pillars the National Verifier is trying to confirm.
- Identity and age: unexpired ID showing full legal name and date of birth, plus required identifier details such as SSN last 4 or Tribal ID number where applicable.
- Address: document showing your name and physical residential address, like a utility bill or lease.
- Eligibility: either program proof with clear status and date, or income proof that meets the required coverage, such as a tax return or three consecutive months of pay documentation.
- Household worksheet: only if your address is flagged because someone else at that location already receives Lifeline, or if you are instructed to provide it.
Once you submit clean, consistent documents that prove those three pillars, your approval chances rise dramatically.
And when you keep your uploads simple and readable, you make it easy for the reviewer to say “approved” without hesitation.
Finally, remember the boundary that protects you.
This guide helps you prepare documents, but it cannot guarantee approval, and it does not override official rules, audits, or verification steps.
You should always rely on the official Lifeline documentation guidance and the National Verifier instructions shown in your application portal or mailed notices.